Capture Dynatrace Inputs

The next set of steps assume that your Dynatrace tenant is fully provisioned and you are logged in.
Login into Dynatrace
You can always login to your tenant using the URL https://[ENVIRONMENT ID].live.dynatrace.com or by using the SaaS login link on the top right of the Dynatrace home page.
Collect inputs to workshop setup
You will next gather information needed to configure and deploy easyTravel application. Specifically, we will need the following info from your Dynatrace environment:
- Base URL
- Environment ID
- API token
- PaaS token
For this, have provided a simple UNIX shell script for this workshop that prompts for these values and writes them to a file called creds.json. Later in the workshop steps, there are a few other simple UNIX shell that will automate the step that read this file so that you don’t need to type or copy-paste these values over and over again during the workshop.
Let’s Begin
From the Cloud9 window, run these commands to run this script that will provide a set of prompts for you to enter values. If you mess up, you can re-run the script.
cd ~/modernize-workshop-setup/aws
./inputAWSWorkshopCredentials.sh
Input 1 of 5: Your last name
In the Cloud9 terminal, enter your last name at the prompt. This will be added as a prefix for the AWS resource group name.
Input 2 of 5: Dynatrace Base URL
1 . Copy the Dynatrace base URL from your browser, for example: https://[ENVIRONMENT ID].live.dynatrace.com
Only include the base URL up to the …dynatrace.com
2 . Back in the Cloud9 terminal, paste the value for the Dynatrace Base URL prompt.
Input 3 of 5: Dynatrace Environment ID
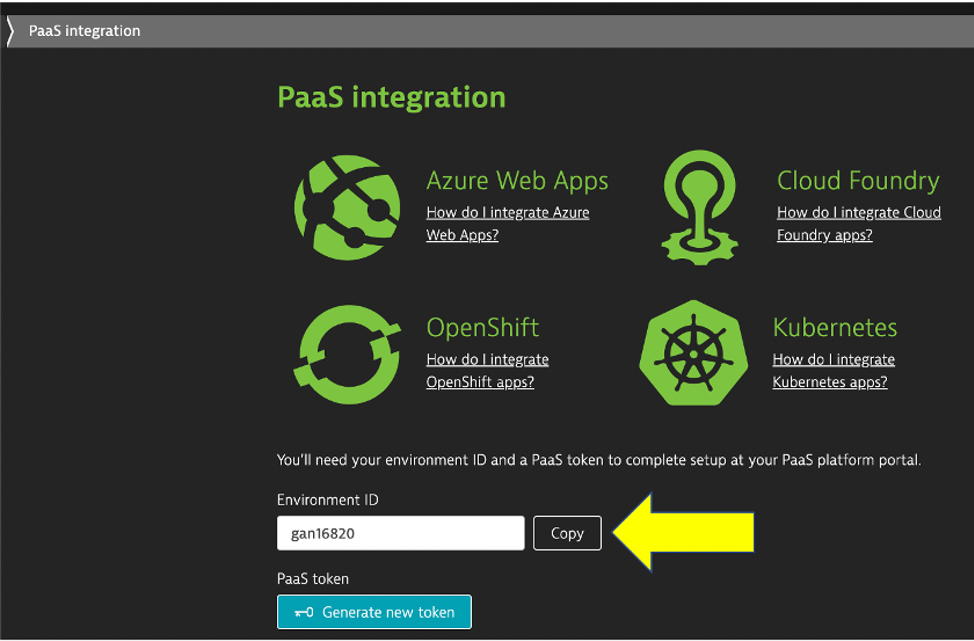
1 . From the Dynatrace left side menu, select Deploy Dynatrace. Then Click the Setup PaaS integration button

2 . Click the Copy button under the environment ID.
3 . Back in the Cloud9 terminal, paste the value for the Dynatrace Environment ID prompt
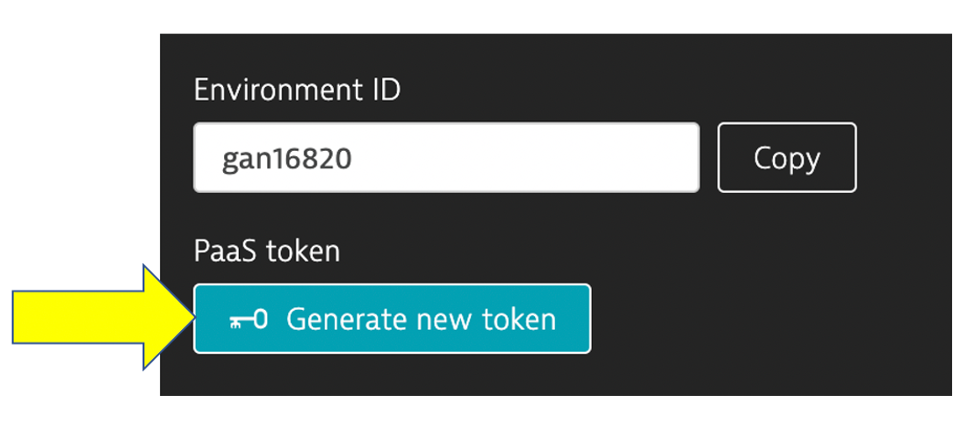
Input 4 of 5: Dynatrace PaaS Token
1 . On this same page. click the Generate new token button.
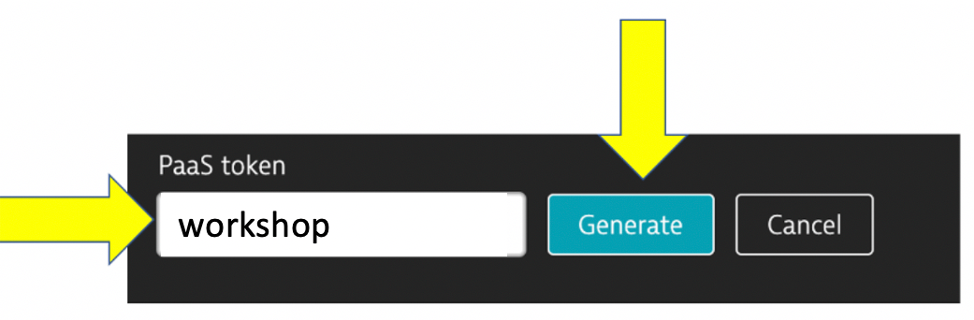
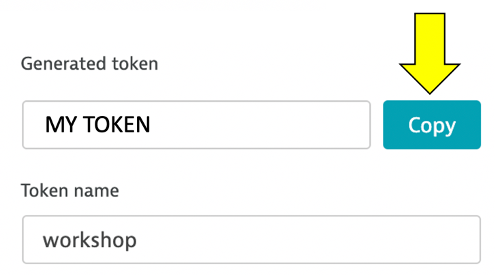
2 . click the Generate button, and then enter a name for your token (e.g. workshop)
3 . then the Copy button
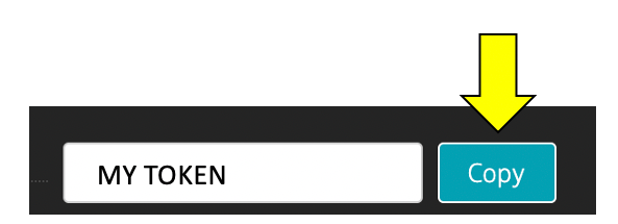
4 . Back in the Cloud9 terminal, paste the value for the Dynatrace PaaS token prompt
Input 5 of 5: Dynatrace API Token
1 . From the Dynatrace left side menu, navigate to: Settings -> Integration -> Dynatrace API
2 . Click on the Generate Token button
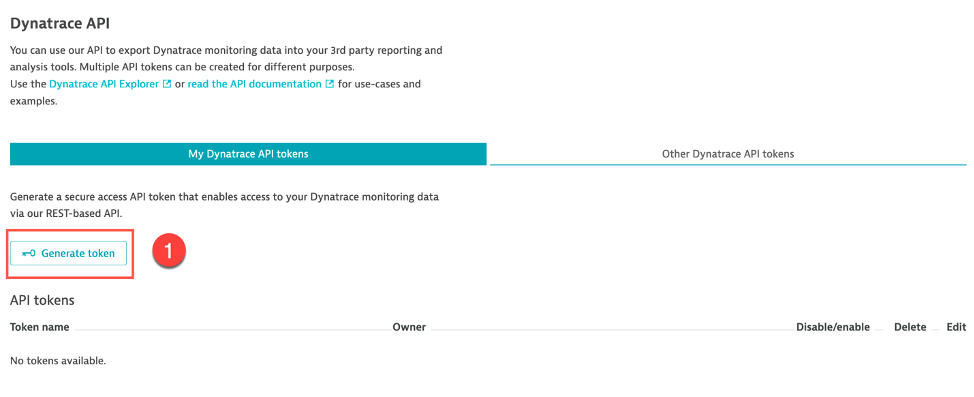
3 . Enter a name for your token (e.g. workshop)
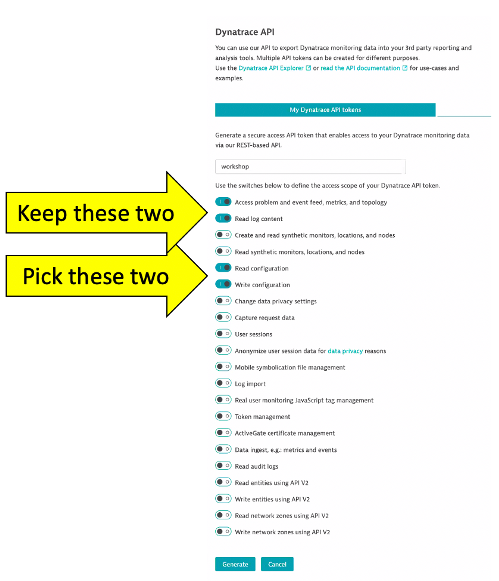
4 . Ensure these options are selected, then click Generate
5 . Expand the newly created token, copy the token value and paste it to your Cloud9 terminal script prompt : API token
6 . Back in the Cloud9 terminal, paste the value for the Dynatrace PaaS token prompt
Verify
Your completed data entry, should look like this.
Please confirm all are correct:

Your Last Name           : MY-LAST-NAME
Dynatrace Base URL       : https://MY-ENVIONMENT.live.dynatrace.com
Dynatrace Environment ID : MY-ENVIONMENT
Dynatrace PaaS Token     : MY-PAAS-TOKEN
Dynatrace API Token      : MY-API-TOKEN
Is this correct? (y/n): y
After you confirm, the script will show the saved values in the creds.json file. You can view again by simply typing cat creds.json. NOTE that the AWS Location and AWS Resource Group are pre-configured.
If you mess up, you can re-run the inputAWSWorkshopCredentials.sh script again and will prompt you again for each value.