Dynatrace Operator Installation Walk-Through
Dynatrace Operator Installation Walk-Through
One key Dynatrace advantage is ease of activation. OneAgent technology simplifies deployment across large enterprises and relieves engineers of the burden of instrumenting their applications by hand. As Kubernetes adoption continues to grow, it becomes more important than ever to simplify the activation of observability across workloads without sacrificing the deployment automation that Kubernetes provides. Observability should be as cloud-native as Kubernetes itself.
In our workshop, we will install the Dynatrace Operator that streamlines lifecycle management. You can read more about it here in this Dynatrace Blog
Organizations will often customize the Dynatrace Operator installation and you can read more about the options in the Dynatrace Doc but, we are going to use a single command that we can get from the Dynatrace interface to show how easy it is to get started.
-
To navigate to Deploy Dynatrace Page, follow these steps and refer to the picture below:
- Within Dynatrace, click on the
Deploy Dynatracemenu - Click on the
Start Installationbutton - Click on the
Kubernetesbutton

- Within Dynatrace, click on the
-
To get the Dynatrace Operator installation command, refer to the steps and pictures below:
- On the Kubernetes configuration page, enter
dynatracefor the name andworkshopfor the group. This is not the cluster name, it will show up as the Kubernetes page name in Dynatrace - Click the
Create tokensbutton - Select the
Skip SSL Certificate Checkto be ON
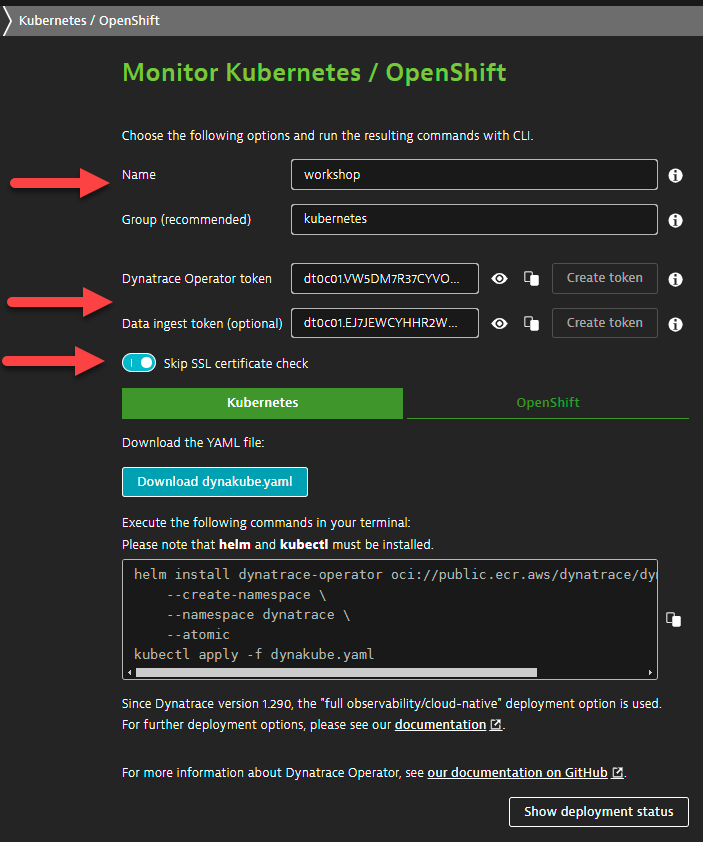
- On the Kubernetes configuration page, enter